I'm fairly sure that I forgot to mention that I'm a photographer in my last post. Just a studying one but I take some good stuff. Anyway, one of the things that I always wanted to learn how to do when I took up photography was something like this:
I wanted to be able to have a black and white photo with the focal point having colour.
I know it is a trivial thing to do, but I think it's useful to any beginner photographer. Please don't make fun of me, I'm just trying to help.
Okay, so I'll be using Photoshop Elements 9 for Mac. It's a good, powerful program. But if you can't afford Photoshop then the instructions will be fairly similar for Gimp (a freeware image processor)
Open your photo-editing software and select: File - Open. Select the File that you want to open and it will appear in the main screen.
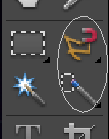
Using either the quick select tool or the magnetic lassoo, carefully select the focal point of the photo that you want to remain coloured.

Once you have selected the coloured object, select Copy (Edit - Copy) and the Paste it back down (Edit - Paste)
You will now have two layers. One layer with the whole picture (named 'Background') and one with just the selection (named 'layer 1')
Select background, which is your selection, in the layers box.
Now go to Enhance - Convert to Black and White:
When this box opens, select okay. Make SURE you are on your background layer.
Once it goes back to the main editing screen, you should have a photo that looks like this:
Congratulations! You have just finished your first layered colour on black+white photo!
Check back soon for more tutorials xx


No comments:
Post a Comment